Download this How To in PDF format.
A custom shift knob assembly usually ranges in price from $75 up to $195. Installation of a shift knob is easy and requires only a few tools. With a little ‘attention to detail’, almost anybody can do it!
The first bit of info you will need to know to purchase a custom aftermarket shift knob and decorative collar is – What transmission do I have? You will need to know if it is an 18, 13, 15, 9, 10 speed or an ‘Super 10’ speed to insure you buy the correct knob for your truck.
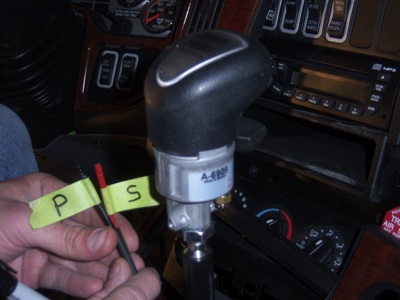
With your Truck turned off, eliminate all air pressure supplying the shift valve. Use a Phillips screwdriver (or torx head driver in some applications) to remove the two screws that secure the black plastic collar to the shift valve. Slide the collar down on the shift stick to provide access to the brass fittings that plumb the plastic air lines to the shift valve. As you disconnect the air lines, individually label each line with the corresponding letter labeled on each port of the shift valve. This will insure you get them re-connected properly during re-assembly.
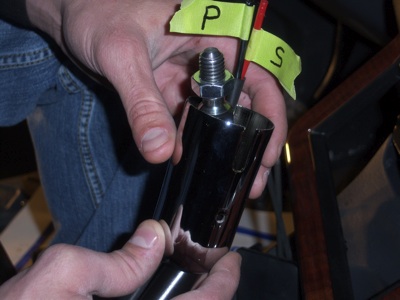
Once you have disconnected the small hoses, loosen the ‘jamb nut’ on the bottom of the shift valve assembly with a ¾” wrench, then unscrew the original shift knob.
Place the new chrome collar over the shift stick and feed the small air lines up thru the collar. Next, screw the original shift valve back onto the stick to the original position, then tighten the jamb nut. Use a small screwdriver or pocketknife to remove the silver ‘ID tab’ from the top/center of the shift knob. Remove the two torx head bolts under the tab and lift the original black rubberized plastic shift knob body off of the valve ass’y. Lift it slowly so as not to dislodge or disturb any check balls or springs.
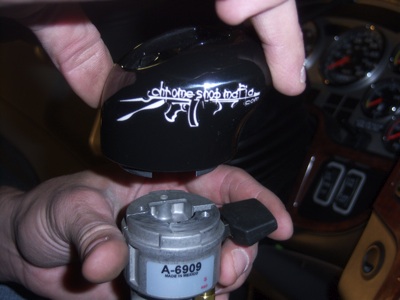
Gently set the new custom shift knob onto the shift valve and replace the two torx head bolts that secure the knob to the shift valve body. Tighten the torx head bolts snugly and install the new trim tab in the top of the shift knob.
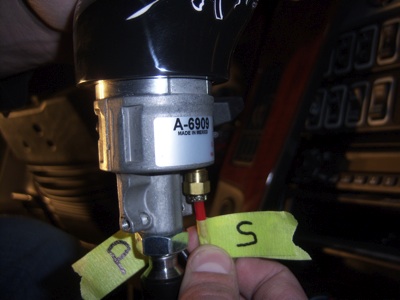
Reconnect the small plastic air lines to the shift valve and make sure you connect the correct air line to each port. Slide the chrome lower collar back up against the bottom of the shift valve and replace the screw that secures it to the shift valve.

Start your truck engine, build air pressure, work your splitter knobs thru each position and listen for possible air leaks. If you don’t hear any leaks………….Congrats!
You’ve done it! You are now ready to go ‘truckin in style’, with your new Custom Shift Knob-ENJOY!